Oracle Data Provider Installation Guide.
1. Requirements
-
Server: Oracle 9i (9.0.1) or later version.
-
ODP.NET
-
Client: Oracle 9i (9.2) ClientRuntime or later version.
2. Server Preparation
2.1. Installing Oracle data storage with clean Sitecore installation
-
Install Oracle Database Server.
Please refer to Oracle documentation concerning this step.
-
Install ODP.NET data provider
Follow the link below for instructions:
http://www.oracle.com/technology/software/htdocs/distlic.html?/technology/software/tech/windows/odpnet/utilsoft.html
-
Create new Oracle database.
Database for Sitecore schemas should be created. You can use built-in Database Configuration Assistant for this purpose.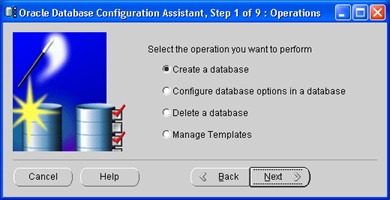
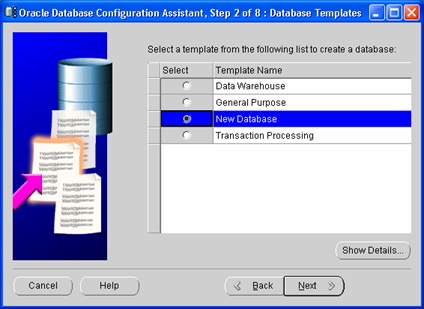
Modify database parameters on the installation steps (you can disable all additional features since they are not needed for Sitecore).
It’s highly recommended to change default password values (wizard will prompt you for this). -
Create Sitecore schemas and users and import initial Sitecore data
Oracle data provider and Oracle migrating tools are distributed in a single zip archive. You should extract it somewhere on your hard disk.
Known Issue: the archive should be extracted into such folder to keep the full path without spaces. For example, C:\temp\OracleDataProvider, but not “C:\temp\Oracle Data Provider”. Otherwise, the migrating tools will work incorrectly.You should execute SQL script to create appropriate Sitecore schemas. Initial Sitecore data are deployed from dump file supplied with the package.
The required steps are performed by the createData.bat file.
Please modify createData.bat to define create parameters:
DATABASE – name of Sitecore database
PASSWORD – password for system user in your database
ORACLE_DATA_DIR – path to Oracle data storage folder
Dump file should be placed in the same folder as createData.bat file.
Log file will be placed in the same folder with name <databasename>log.txt
Please note that if you run import script not from the Oracle server, you should add appropriate TNS name into your Oracle Client configuration. You can use Net Configuration Assistant of Oracle client tools or modify the <orahome>/network/admin/tnsnames.ora file manually.
2.2. Converting MS SQL data storage to Oracle storage
-
Install Oracle Database Server.
Please refer to Oracle documentation concerning this step.
-
Install ODP.NET data provider
Follow the link below for instructions:
http://www.oracle.com/technology/software/htdocs/distlic.html?/technology/software/tech/windows/odpnet/utilsoft.html
-
Create new Oracle database.
Database for Sitecore schemas should be created. You can use built-in Database Configuration Assistant for this purpose.
It’s highly recommended to change default password values.
-
Transfer data from MS SQL to appropriate Oracle databases.
To transfer existing data from MS SQL you should use the “MS SQL-TO-ORACLE” tool supplied with this package.
IMPORTANT NOTE: Before converting your data using MS SQLToOracle tool, you should specify the local service name in order to make the chosen service available from the computer you run this script from. Please, refer to the Using Net Configuration Assistant paragraph below to learn how to manage this.Here are the steps to follow for data migration from MS SQL to Oracle database:
- Modify ALL files in the folder /mssqltooracle/schema/ starting from the folder where the archive was extracted to. You should provide the correct database name in all the connection strings in these files
e.g. change @sitecore to @[your_db_name]. - Run createschema.bat.
- Open the sql_dump_data.bat file placed in the same folder for editing and specify the paths to DUMP_ROOT and LOBS_ROOT and SQL databases in all the connection strings.
- Run sql_dump_data.bat.
- If the destination Oracle database is not empty for some reason, please run oracle_all_remove.bat placed in the same folder.
Note that you should modify the connections strings in both oracle_all_remove.bat and all_remove.sql providing the correct name of the database and username/password. - Modify oracle_load_data.bat placed in the same folder providing the correct database name. Run oracle_load_data.bat.
- Create stored procedures by running the following file:
/sitecore modules/shell/Oracle Migrating/MSSQLToOracle/SCHEMA/createproc.bat.
You should provide the correct database name in all the connection strings in these files
Data migration is complete.
Using Net Configuration Assistant
Follow the steps below to make the service recognizable for the data transferring tool.
Start the Net Configuration Assistant from the set of Oracle managing tools:
Page 1 : Choose “Local Net service name configuration”, press Next.
Page 2 : Choose Add (selected by default) to add a local service name, press Next.
Page 3 : Choose “Oracle 8i or later database or service” (default value), press Next.
Page 4 : Provide a service name. Note: this is the name you’ll enter into the Service field of transferring tool, press Next.
Page 5 : Select TCP protocol, press Next.
Page 6 : Provide a host name of your Oracle server (or IP), e.g. 192.167.167.24. Press Next.
Page 7 : Choose “Yes, perform a test” if you’d like to test the connection (recommended). If you receive errors during the test, provide the correct user name and password for this service and perform the test again. The message should be “Test successful”. Press Next.
Page 8 : You’ll be prompted for the name for this newly added Net Service name. Leave default value (equals to the Net Service name) and press Next.
Page 9 : Here, on the last stage, you’ll be prompted to perform any other operation, choose “No” (default value) and press Done to quit the wizard.
Afterwards, the service name will be recognized by the Data Transfer script.
- Modify ALL files in the folder /mssqltooracle/schema/ starting from the folder where the archive was extracted to. You should provide the correct database name in all the connection strings in these files
3. Client Side Preparation
-
Install Oracle Windows Client on the web server
Please refer to Oracle documentation concerning this step.
-
Install ODP.NET data provider
Follow the link below for instructions:
http://www.oracle.com/technology/software/htdocs/distlic.html?/technology/software/tech/windows/odpnet/utilsoft.html
-
Configure Oracle client
Add appropriate TNS name into your configuration. You can use Net Configuration Assistant of Oracle client tools or modify the <orahome>/network/admin/tnsnames.ora file manually.
-
Modify web.config.
Make changes in the web.config file as described below.
<configuration>
   <sitecore database=“Oracle”>
   <!-- CONNECTION STRINGS -->
    <connections database="sitecore" prefix="sc">
      <archive>data source=$(database);user id=$(prefix)arc;password=$(prefix)arc;</archive>
      <core>data source=$(database);user id=$(prefix)core;password=$(prefix)core;</core>
      <extranet>data source=$(database);user id=$(prefix)extranet;password=$(prefix)extranet</extranet>
      <master>data source=$(database);user id=$(prefix)master;password=$(prefix)master;</master>
      <recyclebin>data source=$(database);user id=$(prefix)recbin;password=$(prefix)recbin;</recyclebin>
      <security>data source=$(database);user id=$(prefix)security;password=$(prefix)security;</security>
      <web>data source=$(database);user id=$(prefix)web;password=$(prefix)web;</web>    </connections>
…
NOTE: The database attribute of “sitecore” tag should have the value “Oracle”.
5. Move the provider assembly to the /bin folder.
Copy the Sitecore.oracle.dll from the /binary folder of the unzipped archive to the /bin folder of Sitecore installation. Start Sitecore.
NOTE: Before starting Sitecore with Oracle data provider, make sure that the accounts ASPNET, IUSR_<MachineName> and IWAM_<MachineName> have the following permissions for Oracle home folder and all its descendants:
- Read & Execute;
- List folder contents;
- Read.
4. Upgrade Instructions
The upgrade from Oracle 1.0 BETA is impossible. However the data can be moved using the Packager tool from one installation into another.